Follow this recipe tutorial at home to make my simple 3-ingredient cheesecake crust. The recipe is gluten-free and nut-free, and packed with nourishing ingredients including soluble fiber and protein. Made from 3 pantry staples – rolled oats, honey and coconut oil – this tasty trio of ingredients creates a satisfying crunchy texture with a hint of sweetness, and a rich, toasty flavor that compliments any cheesecake filling you choose. Ready in 25 minutes!

I’ve said it once and I’ll say it again. Oats are one of those magical whole grains that I absolutely love as a Registered Dietitian. Packed full of fiber, B vitamins and protein, these nutrition rich grains are easy to incorporate into a variety of dishes like this delicious homemade gluten-free crumble and these banana oat pancakes and even this savory tomato oat soup.
What You Need To Make This Oatmeal Crust
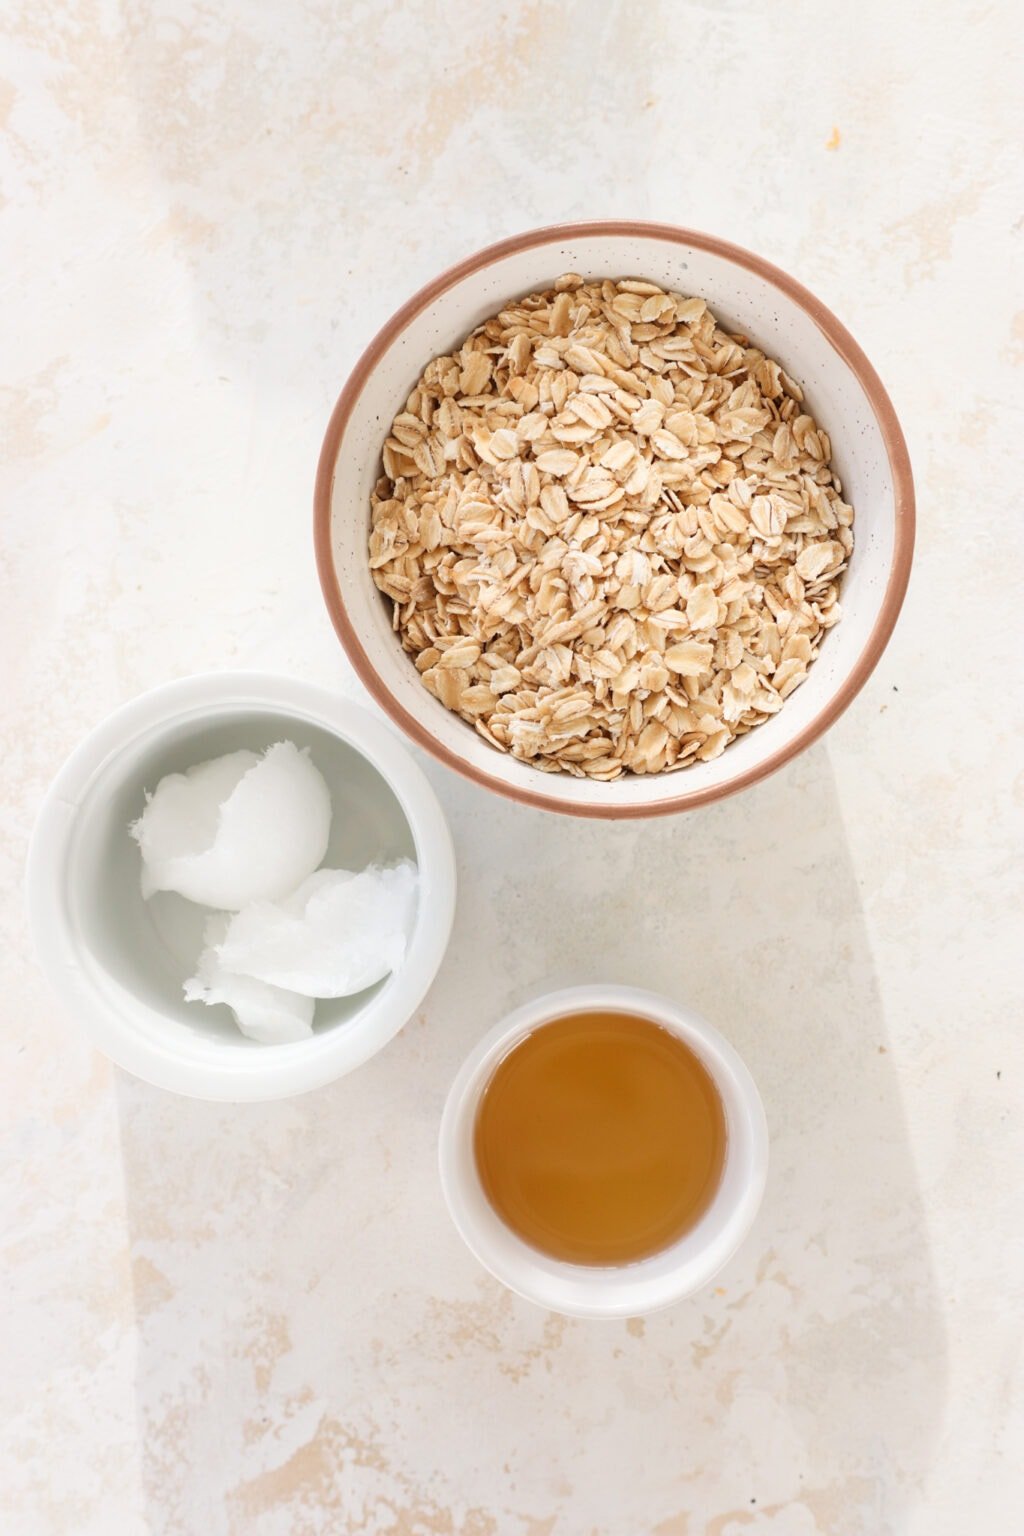
I love this recipe because it uses 3 common pantry staples – rolled oats, honey and virgin coconut oil – is not intimidating to those new to baking, and is a tasty gluten free option for those who need or prefer it.
Oats: We always have oats on hand in our house and I’ve been known to add them to almost anything including this cinnamon roll smoothie and these gluten free oatmeal cookies for an added boost of filling fiber and protein.
In this recipe, the oats are used as the base for the crust and are a great gluten-free alternative to the traditional graham cracker crust used in most cheesecake recipes. If you are wanting to go the traditional route, you can use graham crackers as a substitute!
Honey: Honey helps to bind the ingredients together. When combined with the melted coconut oil, it creates a sticky (and tasty!) mixture that helps hold the crust together. It also adds a natural sweetness to the crust, balancing out the flavors of the coconut oil and the oats.
Coconut oil: The most important thing to remember when making this recipe is to use virgin coconut oil (solid at room temperature). You can buy refined coconut oil which stays liquid at room temperature. Do not use it in this recipe. I made this mistake once and ended up with crumbly crusts. The coconut oil will return to its solid state when it goes in the fridge or freezer and is the key ingredient to holding your crust together.
The coconut oil also adds a slight coconutty flavor that pairs nicely with the nutty flavor from the baked oats.
How To Make This Delicious Nutritious Dessert
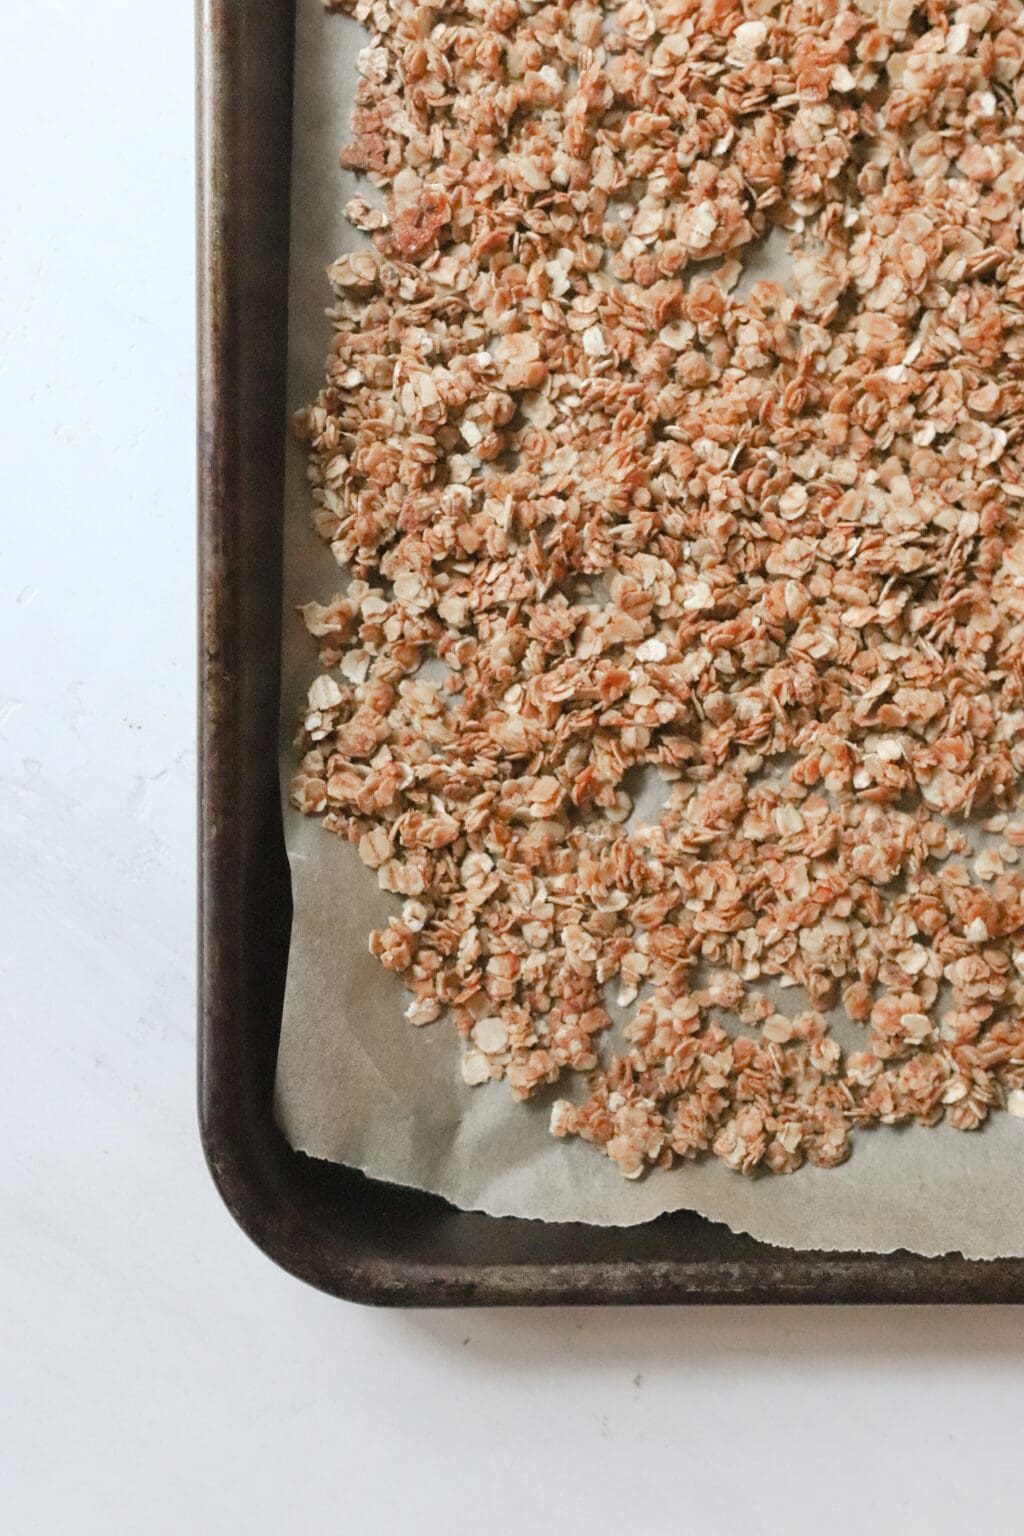
Start by toasting the oats. Preheat the oven to 350F and line a baking sheet with parchment paper. Line a muffin tin with parchment paper or silicone muffin cups.
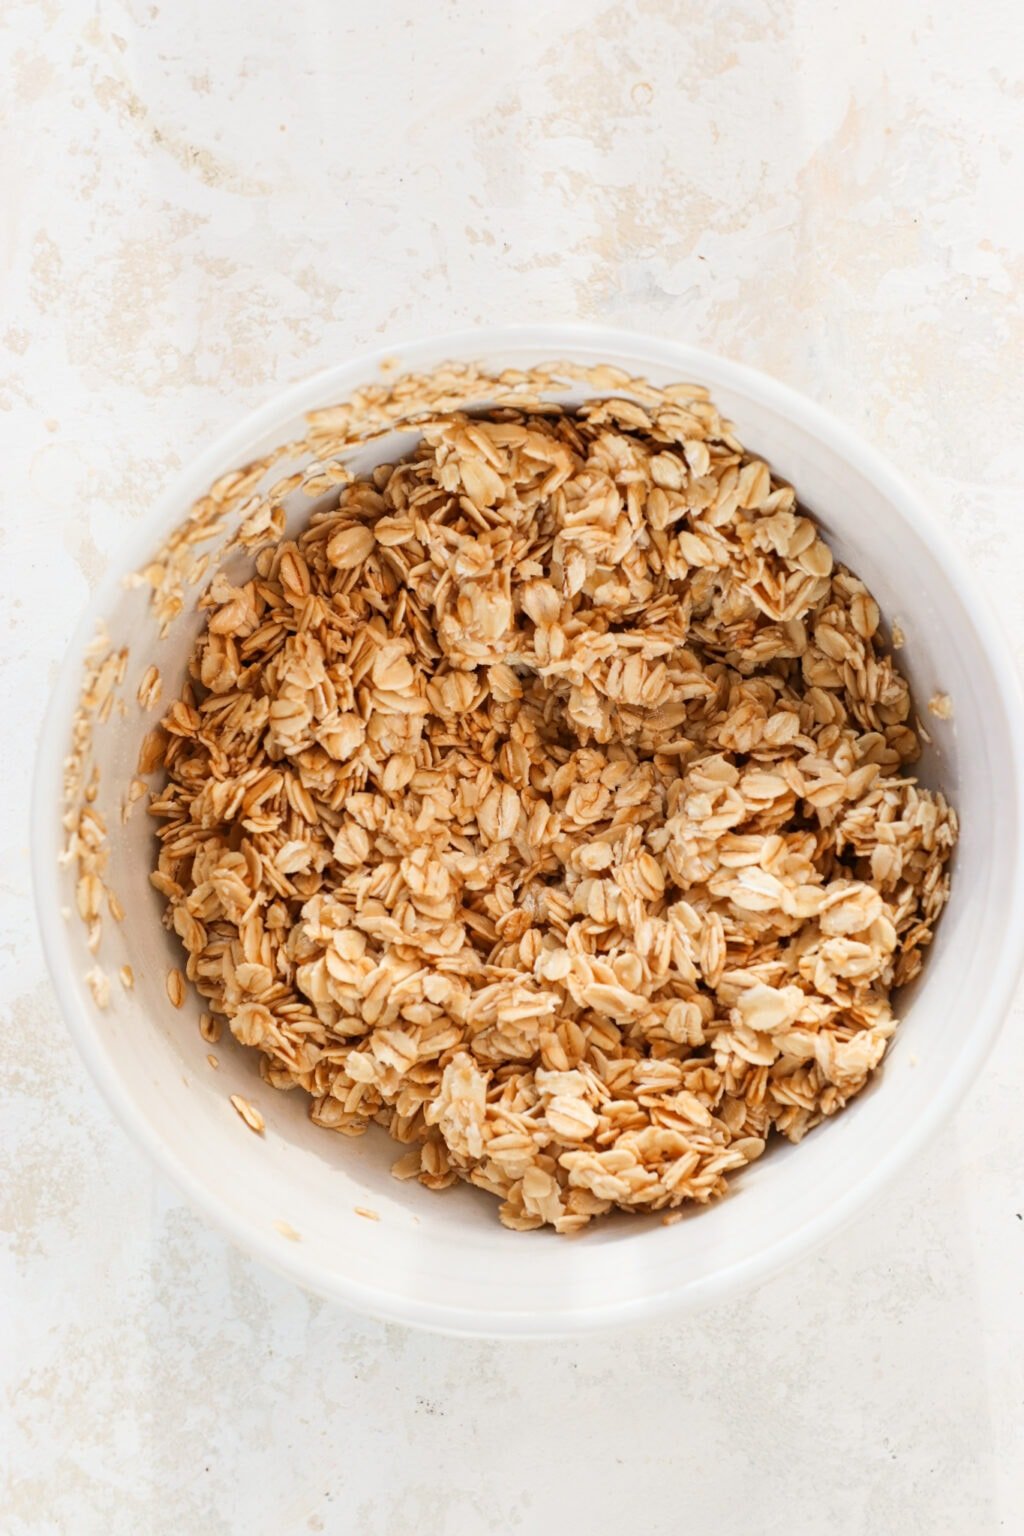
Next, in a medium bowl, whisk together 2 tablespoons melted coconut oil with 2 tablespoons of honey. Stir in the oats and mix until evenly coated.
Spread the oat mixture evenly onto your lined baking sheet and bake for 15 minutes, stirring halfway through. The oats should be a golden brown color and have a toasty aroma.
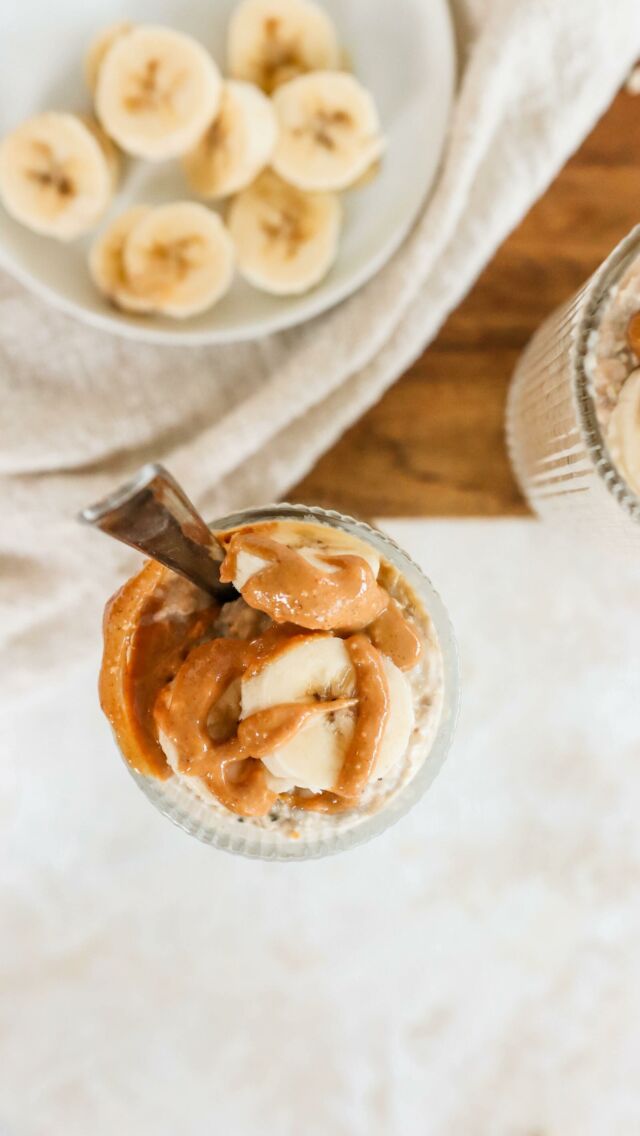
Note: if making a filling, this is a great time to do it! You can use your favorite recipe or make this creamy eggnog filling, this vegan coconut cheesecake filling or this no-bake white chocolate filling.
When the oats have come out of the oven, add them to a food processor and pulse until they reach a fine crumb texture, about 30 seconds. Add remaining 2 tablespoons of melted coconut oil pulse in again until evenly combined. Evenly distribute the mixture into your lined muffin tin
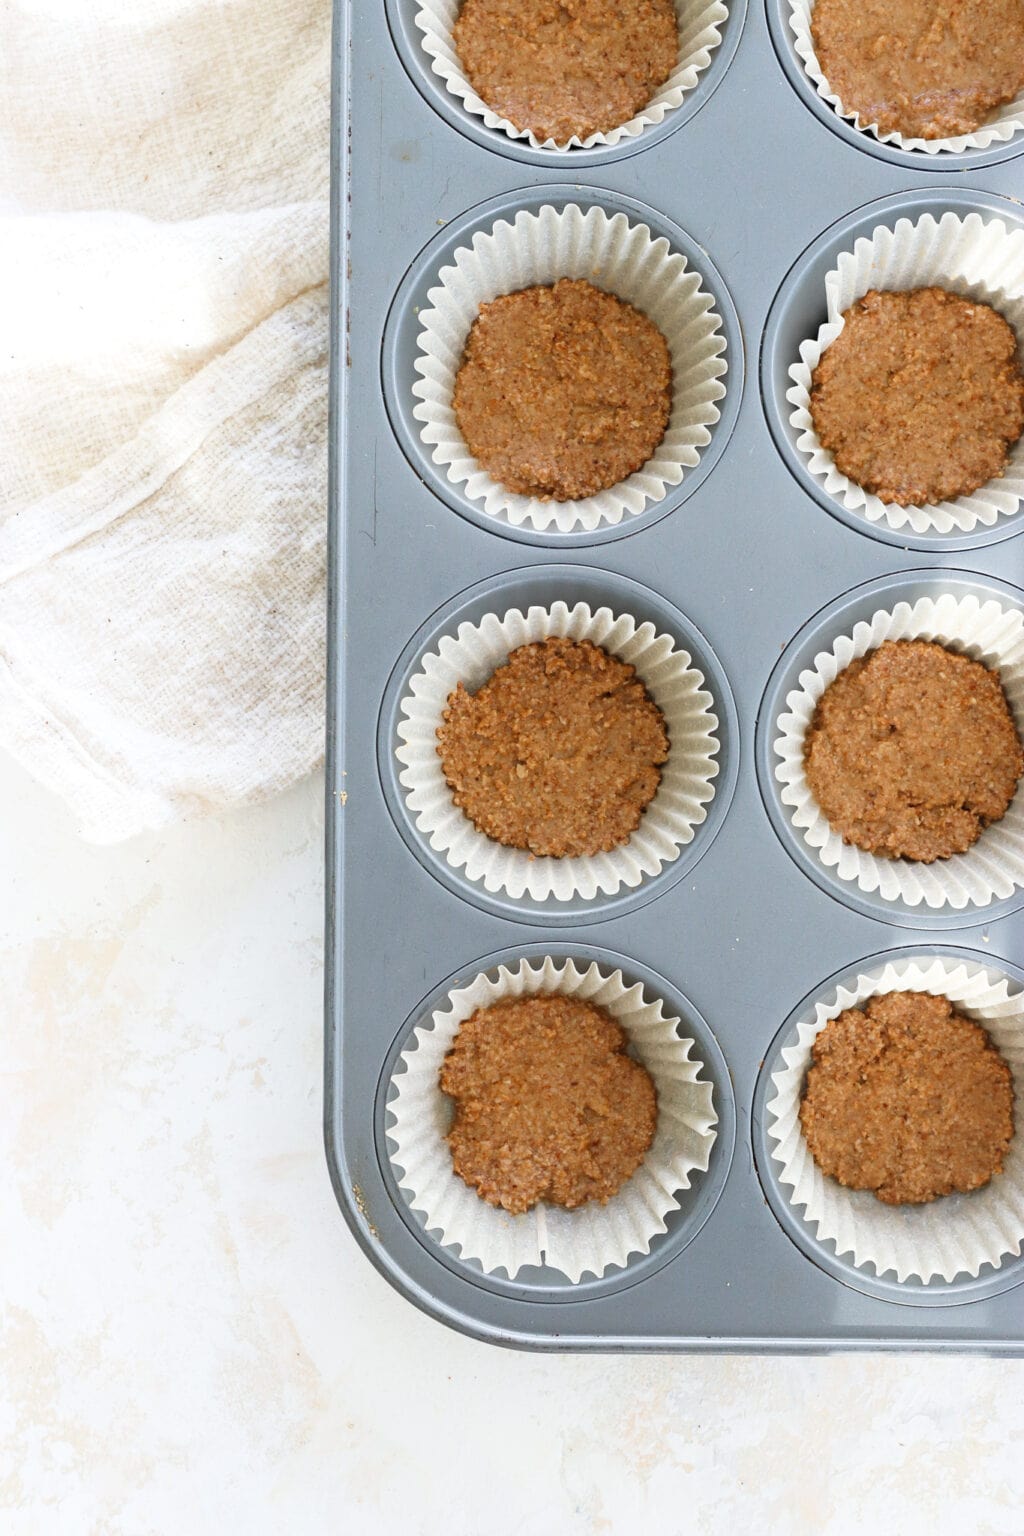
Press down with your fingers or the back of a spoon and return to the oven to bake for 5 more minutes. Remove from the oven and cool on the counter or in the fridge, about 10 minutes (crusts will appear a bit wet and crumbly but will harden as they set)
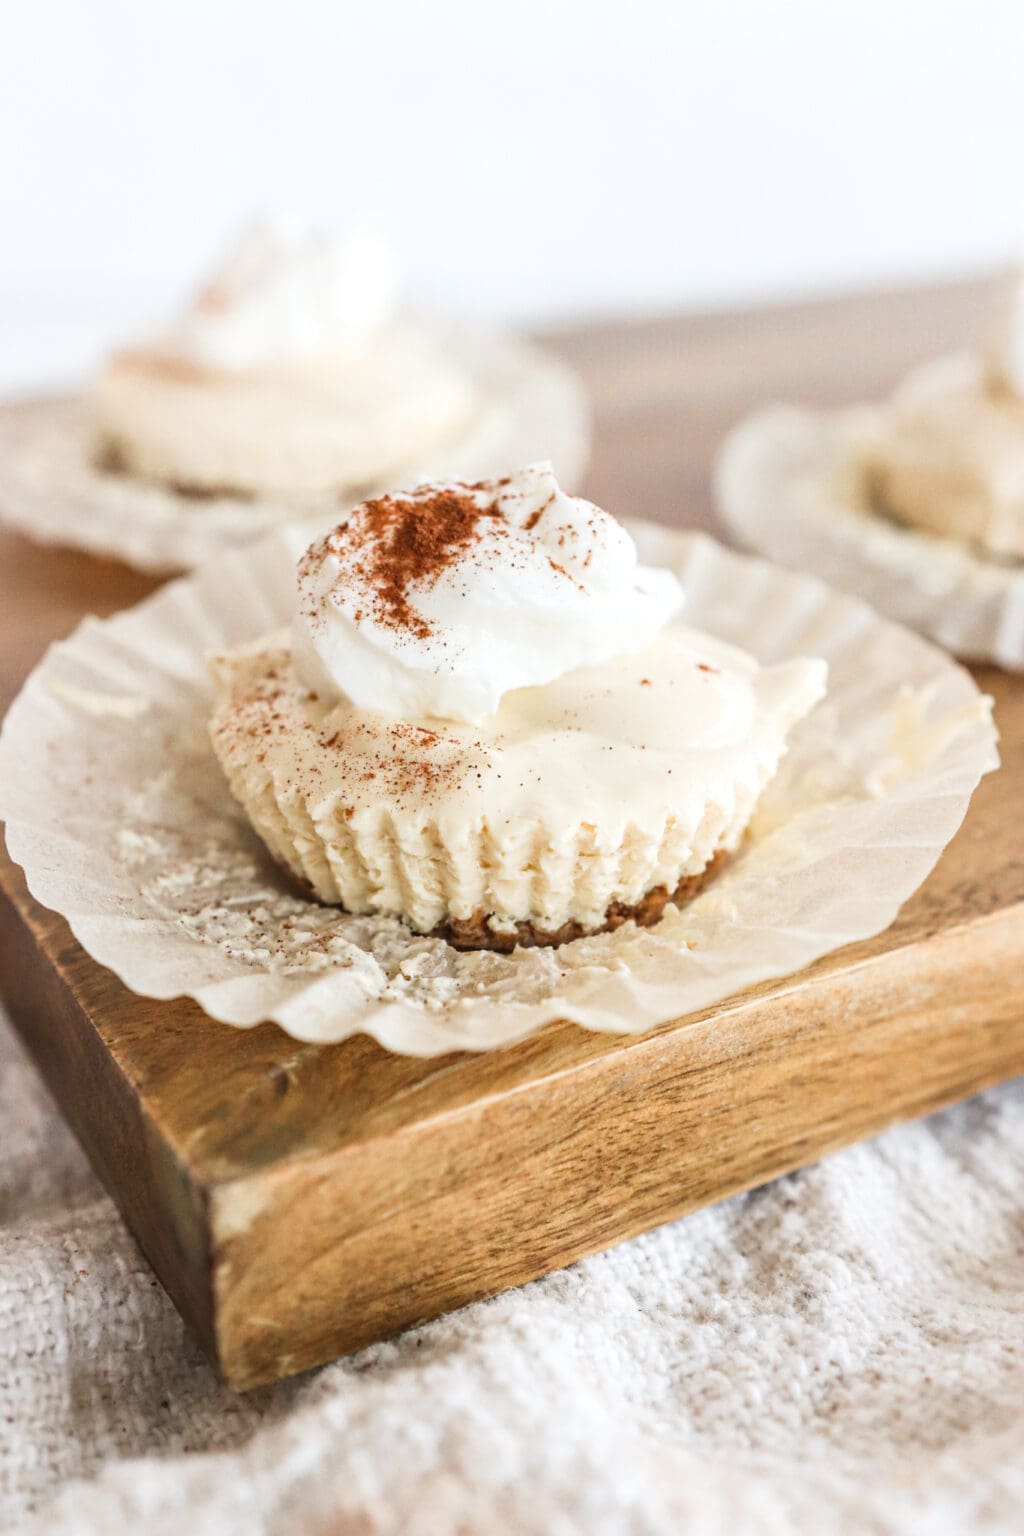
Once cooled, add your filling (if using this eggnog filling, place in the freezer at least 6 hours or in the fridge overnight to set)
Can you use Steel Cut Oats to Make this Recipe?
Technically speaking, yes you can use steel cut oats for this recipe (they are also gluten free). However, steel cut oats are not as processed (aka steamed) as rolled oats, so they may not stick together as well when forming the crust. If you have rolled oats or quick oats, use those. If you’re in a bind you can use the steel cut oats. I would grind them a little finer to ensure the final product sticks together.
If you are finding the crust keeps crumbling, add an extra tablespoon of coconut oil and throw the finished crust in the freezer.
Nutritional Benefits
Cheesecake crusts are usually made out of graham crackers, but this recipe offers a gluten-free alternative that adds additional nutrition without sacrificing flavor.
Rolled oats: Rolled oats are a whole grain, providing fiber, B-vitamins, and a bit of protein. They support digestion and gut health and are also great for blood sugar balance.
Honey: Honey is a natural sweetener that has a good source of antioxidants and has been shown to have anti-inflammatory and antimicrobial properties.
Coconut oil: Coconut oil has a medium to high smoke point and has potential antioxidant, anti-inflammatory and anti-bacterial benefits. Fat is often referred to as the “satiety factor” by us dietitians and is key to leaving you feeling not just full, but satisfied. You can learn more about different types of cooking oils here.

Crust Flavor Boosters
I love this crust as is. I find it to be the perfect combo of sweet and crunchy, but sometimes it’s nice to add a complimentary boost of flavor when using different fillings. Here are a few options you can add to give this gluten-free cheesecake crust an extra boost of flavor.
Cinnamon: Cinnamon adds a warm and spicy flavor to the crust that pairs well with many different cheesecake fillings. You can add ground cinnamon to the crust mixture, or sprinkle it on top of the crust before baking.
Vanilla extract: Vanilla extract is a classic flavor booster that adds a rich and sweet aroma to the crust. Simply add a teaspoon or two of vanilla extract to the crust mixture before pressing it into the tart molds.
Lemon zest: Lemon zest adds a bright and citrusy flavor to the crust that pairs well with many different cheesecake fillings. Grate the zest of one lemon and mix it into the crust mixture before pressing the crust into the molds.
Nutmeg: Nutmeg adds a warm and spicy flavor to the crust that pairs well with many different cheesecake fillings. You can add ground nutmeg to the crust mixture, or sprinkle it on top of the crust before baking.
Cocoa powder: Cocoa powder adds a nice chocolatey flavor if you’re looking for something a bit different!
Recipe, Kitchen, & Time Saving Hacks
Batch prep to make granola AND cheesecake crust: If you’re a granola lover like me, you can actually make a big batch of the toasted oats and add in dried fruit or chocolate chunks. Just double or triple the ingredients used in steps 1 to 4 of the recipe. Use the amount needed to make the cheesecake crust and then store the rest in an airtight container. Note this will be a looser vs. chunky granola. You can use this as cereal or to top your yogurt breakfast bowls or even smoothies for an extra crunch and boost of nutrition.
Use kitchen tools: I love using kitchen tools to save extra time in the kitchen. Whether they speed up the recipe making process or make my clean up a breeze, kitchen tools are your friend. Here are a few that I love for this recipe:
- Food processor: Yes, you can use a kitchen mallet if you don’t have a food processor, but I highly recommend investing in a food processor (with blade attachments) if you can. For this recipe, it’s a quick and easy way to make that crunchy crust texture. Plus you can use it for other kitchen hacks – like shredding cheese, grating beets and carrots, or making energy balls.
- Non-stick reusable silicone sheets or parchment paper: Lining your baking sheets with these non-stick reusable silicone baking mats or parchment paper makes cleaning up a breeze! The silicone sheets are so easy to wash (or you can throw them in the dishwasher).
- Silicone tart molds: I LOVE my silicone tart molds. You don’t need muffin tin liners if you use these and, like the silicone baking mats, they are SO easy to clean up. No-stick and dishwasher safe, yes please!
If you make this gluten free cheesecake crust, it would make my day if you would leave a comment and/or star rating below— I love hearing your feedback! And don’t forget to snap a pic and tag me on Instagram @lindsaypleskot.rd so I can see your versions! It makes me so happy to see these recipes come to life in your kitchens! XO
Print
3-Ingredient Gluten Free Cheesecake Crust
- Total Time: 25 minutes
- Yield: 8 Tarts 1x
Description
Follow this recipe tutorial at home to make my simple 3-ingredient cheesecake crust. The recipe is gluten-free and nut-free, and packed with nourishing ingredients including soluble fiber and protein. Made from 3 pantry staples – rolled oats, honey and coconut oil – this tasty trio of ingredients creates a satisfying crunchy texture with a hint of sweetness, and a rich, toasty flavor that compliments any cheesecake filling you choose. Ready in 25 minutes!
Ingredients
1 cup rolled oats
1/4 cup melted virgin coconut oil, divided
2 Tbsp honey
Instructions
-
Preheat the oven to 350F and line a baking sheet with parchment paper or a silicone mat. Line a muffin tin with parchment paper or silicone cups and set aside.
-
Melt the coconut oil in the microwave. To a medium bowl, add 2 tablespoons of the coconut oil and whisk with the honey until well combined.
-
Add the oats to the bowl with the coconut honey mixture. Stir until the oats are coated
-
Spread the oat mixture evenly onto the lined baking sheet to ensure it doesn’t burn. Bake for 15 minutes or until the oats are golden brown, stirring once or twice. Note: if making a filling, this is a great time to do it! You can use your favorite recipe or make this creamy eggnog filling, this vegan coconut cheesecake filling or this no-bake white chocolate filling.
-
Remove oats from the oven and add to a food processor. Pulse until a fine crumb consistency is reached, about 30 seconds. Add the remaining 2 tablespoons of melted coconut oil, and pulse until well combined.
-
Press down with your fingers or the back of a spoon and return to the oven to bake for 5 more minutes. Remove from the oven and cool on the counter or in the fridge, about 10 minutes (crusts will appear a bit wet and crumbly but will harden as they set). At this stage you can either add your desired fillinbg, store in an airtight container in the fridge up to 1 week or freezer up to 3 months.
- Prep Time: 5
- Cook Time: 20
- Category: dessert


Leave a Comment & Rate this Recipe